

The fastest way to lift your Shopify conversion rate is to diagnose your biggest funnel leak and fix it, not run random tests. Start with a mobile-first audit of your product pages, checkout and site speed. Fixing the worst leak usually takes days to a few weeks; running a proper A/B test to confirm the win takes weeks to a couple of months. Do them in that order.
TL;DR:
- Improving mobile page load speed and fixing the buy box clarity are the quickest methods to boost conversion rates by addressing the most common leaks.
- Tracking and segmenting add-to-cart, cart-to-checkout, and checkout-to-purchase rates separately enable precise identification of where abandonment occurs.
- Optimizing product pages with clear pricing, reviews, and benefit-driven images significantly influences buyers’ decisions without requiring extensive redesigns.
- Enabling guest checkout, faster payment options, and early shipping cost disclosure are essential to reducing cart abandonment at checkout.
- Prioritizing quick technical fixes like image compression and removing unused apps yields impactful, measurable improvements early in the CRO process.
Table of Contents
- Shopify conversion audit: a mobile-first checklist to find the leak
- How to calculate conversion rate and the metrics that pinpoint the leak
- What’s a “good” Shopify conversion rate?
- High-impact product page and trust fixes that reliably move conversion
- High-impact cart and checkout fixes to reduce abandonment
- Technical performance and mobile-first UX: practical checks and fixes
- Testing and measurement: rules for valid A/B tests
- Prioritisation roadmap: quick wins, then medium fixes, then scale
- Moor Marketing’s CRO framework and what clients have seen
- Using Shopify-specific apps and integrations for conversion optimization
- Personalisation tactics using Shopify customer data
- Strategies to reduce cart abandonment specific to Shopify stores
- Author perspective: three counterintuitive lessons from real CRO work
- How Moor Marketing can help: audit, sprints and ongoing CRO
- Sources
Shopify conversion audit: a mobile-first checklist to find the leak
Most Shopify stores lose sales in the same three places: the product page, the cart, and checkout. Over 70% of eCommerce traffic now arrives on mobile devices, and mobile typically converts worse than desktop unless the store has been built mobile-first, which is why your audit has to start there rather than on a desktop monitor.
Run this in order, on your phone, on 4G, not on office Wi-Fi:
- The three-second test. Load a product page cold. Can you tell what you sell, why it’s better than the alternative, and what it costs, in three seconds? If you have to scroll to find the price or the “Add to Cart” button, that’s your first fix.
- Product page anatomy. Check whether the buy box (price, variant selector, add-to-cart) sits above the fold, whether reviews are visible without scrolling past three screens, and whether your hero image loads before you’ve finished reading this sentence.
- Cart and checkout walkthrough. Add a product, go to checkout, and count the steps to payment. Note whether guest checkout is offered, whether Shop Pay, Apple Pay or Google Pay show up as one-tap options, and whether shipping cost appears before the final page.
- Technical checks. Look at Largest Contentful Paint (LCP) on a real mobile device over 4G, not just a lab score. Audit installed apps for ones nobody uses (each one adds script weight), and tap every button with your thumb to check nothing is too small or too close together.
For the numbers behind each step, Shopify Analytics breaks down sessions, add-to-cart events, and checkout starts under Reports, and the platform’s built in abandoned checkout emails and Shop Pay integration are worth checking are switched on before you build anything new.
- Sessions and conversion rate: Analytics → Reports → Online Store Conversion Rate
- Add-to-cart and checkout events: Analytics → Reports → Online Store Conversion Over Time
- Device and traffic source splits: Analytics → Reports → Sessions by Device / Sessions by Traffic Source
That audit alone will usually point you at one obvious leak. Fix that before you touch anything else.
How to calculate conversion rate and the metrics that pinpoint the leak
Conversion rate is orders divided by sessions, expressed as a percentage. Measure it weekly rather than daily. Daily numbers on a low-traffic store bounce around too much to mean anything, and a seven-day window smooths out the noise from one big Tuesday or one dead Sunday.
But the overall rate only tells you that something’s wrong, not where. To localise the leak, track these separately:
- Add-to-cart rate: sessions that add a product, divided by total sessions. Low here means your product pages aren’t convincing.
- Cart-to-checkout rate: how many people who add to cart actually start checkout. A gap here usually means shipping cost shock or a clunky cart drawer.
- Checkout-to-purchase rate: how many who start checkout actually pay. This is where payment friction, surprise fees and slow load times do their damage.
- Revenue per session (RPS): total revenue divided by sessions. This is the metric that actually reflects money in the bank, because it accounts for both conversion rate and average order value (AOV) at once.
- AOV: total revenue divided by number of orders.
Why this matters: tracking add-to-cart, cart initiation and checkout completion as separate numbers localises the leak far faster than staring at one blended conversion rate, because a healthy add-to-cart rate with a weak checkout-to-purchase rate points you straight at payment friction instead of product page copy.
Segment every one of these by device (mobile vs desktop), traffic source (paid social vs organic vs email) and top product category. Pull these splits from Shopify Analytics under Reports, filtering by the dimension you need.
What’s a “good” Shopify conversion rate?
Anything consistently above 3% puts you ahead of most peers, and the top performers in the Shopify blog’s own benchmark guidance sit at 3% to 5% or higher.
Those numbers move a lot depending on context, though:
- Traffic source changes everything. Email and SMS traffic to existing customers often converts at 5% or more, while cold paid social traffic to new visitors might sit under 1%, and blending the two into one number hides both stories.
- Price point shifts the baseline. A $30 impulse product will naturally convert higher than a $400 considered purchase, so comparing your furniture store’s rate to a phone case store’s rate is a waste of time.
- Your own baseline beats any external average. The most useful number in your business is last quarter’s rate for your exact traffic mix, not a number from a benchmark report built on stores nothing like yours.
Set your target as an incremental lift on your own baseline, not an arbitrary industry figure. If your mobile checkout-to-purchase rate is at a certain level today, a realistic first target is a moderate increase within a quarter, not “match desktop” in one sprint.
High-impact product page and trust fixes that reliably move conversion
Product pages carry more of the conversion burden than any other page on the site, because this is where interest turns into an “Add to Cart” click or a bounce. A handful of fixes account for most of the movement stores see, and none of them require a rebuild.
- Buy-box clarity. Price, variant selector and the add-to-cart button should sit together, above the fold, with no ambiguity about what happens when the button is clicked. On mobile, make the add-to-cart button sticky so it follows the visitor down the page.
- Reviews and user-generated content. Automate review requests after delivery and surface star ratings and photo reviews close to the buy box, not buried in a tab below the fold. Review visibility is one of the more consistently cited conversion levers in Shopify optimisation research, and it costs almost nothing to implement.
- Imagery and video, compressed properly. Lifestyle shots that show the product in use convert better than plain white-background shots alone, but only if they’re compressed enough not to slow the page down.
- Benefit-led copy. Lead with what the product does for the buyer, then back it with the spec sheet. A sizing chart or a 10-second usage clip removes the hesitation that kills a lot of adds-to-cart.
- Micro-conversions. Smart bundles, “frequently bought together” prompts and trust badges (secure payment, returns policy) near the buy box all nudge borderline visitors over the line.
Pro Tip: Test one buy-box change at a time. Stack five changes at once and you’ll never know which one actually moved the needle, and you can’t roll back a single element if it hurts.
For a deeper breakdown of product page structure and testable elements, a dedicated product page playbook walks through the anatomy in more detail than fits here, and pairing it with collection page merchandising fixes tends to lift the whole discovery-to-purchase path together.
High-impact cart and checkout fixes to reduce abandonment
Checkout is where the most money leaks out of a Shopify store, because it’s the last moment a visitor can back out, and price shock or friction at this point kills sales that were otherwise already won.
- Enable guest checkout. Forcing account creation before purchase is still one of the most common self-inflicted wounds in Shopify checkout design.
- Turn on express payment options. Shop Pay, Apple Pay and Google Pay let returning and mobile shoppers pay in one tap, which matters enormously given how much traffic now arrives on mobile.
- Show shipping and tax early. Nothing kills checkout-to-purchase like a shipping fee that only appears on the final page. Reveal it in the cart, and consider a free-shipping threshold (“free shipping over $75”) to nudge AOV up at the same time.
- Use progress indicators and a clear order summary. A visible three-step progress bar and an order summary that doesn’t require scrolling reduce the anxiety that makes people abandon halfway through.
- Design the cart for quick edits. Quantity changes, variant swaps and removals should happen without a full page reload, and a threshold nudge like “You’re $12 from free shipping” inside the cart drawer is one of the cheaper AOV levers available.
- Add trust badges at the payment step, not just the homepage. Buyers hesitate most right before entering card details, which is exactly where reassurance needs to sit.
None of these require custom development. They’re settings, app configurations or theme tweaks, which is why checkout is usually the fastest phase of a CRO roadmap to execute.
Technical performance and mobile-first UX: practical checks and fixes
A one-second delay in page load time can cut conversions by around 7%, and that number lands harder on mobile, where connection speeds are less predictable and patience is shorter.
Speed on a real phone over 4G matters more than a desktop lab score, because that’s the actual condition most of your visitors are shopping under. A page that scores well in a lab test on office Wi-Fi can still feel sluggish to someone standing in a queue with two bars of signal.
Practical fixes that don’t require a rebuild:
- Compress every image before upload rather than relying on the theme to do it, and use next-gen formats where your theme supports them.
- Defer non-critical scripts. Chat widgets, upsell popups and tracking pixels that load before the product image are a common, invisible drag on LCP.
- Audit installed apps regularly. Every app adds script weight even when it isn’t actively doing anything, and most stores are running two or three they forgot about.
- Choose a performance-friendly theme rather than the most feature-dense one, and add a sticky mobile buy button if your theme doesn’t include one natively.
- Measure with field data, not just lab scores. Google’s PageSpeed Insights reports both, but the Chrome User Experience Report (field data) tells you what real visitors on real connections actually experienced.
Mobile traffic now makes up more than 70% of eCommerce sessions, so speed fixes here affect more of your funnel than almost any other change on this list.
Testing and measurement: rules for valid A/B tests
Fix obvious leaks before you test anything. A test run on a broken checkout only tells you which version is “less bad,” which wastes traffic and time you don’t get back.
- Confirm you have enough traffic first. A/B testing needs a reasonable volume of weekly conversions to reach statistical confidence in a sensible timeframe. If your store gets under a few hundred sessions a week, sequential testing (change, measure, compare to your own baseline) usually beats a split test that would run for months.
- Pick the right success metric before you start. Revenue per session or AOV usually beats click-through rate or add-to-cart rate as your primary metric, because a variant that boosts clicks but tanks average order value is a loss dressed up as a win.
- Set the test duration up front, ideally covering at least one full weekly cycle (to catch weekday and weekend behaviour differences) and, where possible, a full purchase cycle for considered-purchase products.
- Use the right tools for the job. A visual A/B testing tool handles the split; heatmaps and session recordings tell you why a variant won or lost, which matters when you go to build the next test.
- Don’t call a test early just because one variant looks ahead after two days. Early leads reverse more often than most people expect.
For Shopify-specific sequencing on which test to run first, a guide on Shopify test prioritisation covers the order that tends to produce the cleanest early wins.
Prioritisation roadmap: quick wins, then medium fixes, then scale
Diagnosing everything at once and fixing nothing is the most common failure mode in CRO. The fix is a phased plan with real timeboxes.
- Phase 1: immediate technical and trust fixes (one to four weeks). Compress images, remove unused apps, turn on guest checkout and express payment, add trust badges at checkout. These are configuration changes, not builds, and they’re where the cheapest wins live.
- Phase 2: product-page clarity and cart UX (two to eight weeks). Rework the buy box, surface reviews near the CTA, fix the cart drawer, add free-shipping threshold nudges. This phase usually needs some design input and light testing.
- Phase 3: AOV lifts and personalisation once the funnel is stable (eight to sixteen-plus weeks). Bundling, upsells, personalised recommendations and segmented email flows belong here, once you’re not still losing sales to basic friction.
Pro Tip: Review a weekly dashboard of sessions, add-to-cart rate, checkout completion and RPS, and do a deeper monthly review of any A/B tests in flight. Weekly is for spotting problems fast; monthly is for judging whether a test actually won.
Sequencing matters here as much as the fixes themselves. A broader ecommerce scaling framework covers how CRO phases connect to paid acquisition and retention work once the funnel itself is solid.
Moor Marketing’s CRO framework and what clients have seen
Some agencies run this exact loop with clients: audit first, sprint on the biggest leak, test to confirm, then scale what works. No agency should be running split tests on a checkout that’s still leaking guest-checkout customers, and that diagnostic discipline is why the framework holds up across very different stores.
This approach has produced real numbers. Some retailers have achieved significant monthly sales conversion using this approach, and some clients have experienced revenue growth enabling major lifestyle changes.
Engagements start with a diagnostic audit, move into a focused optimisation sprint, and can continue as an ongoing retainer once the funnel is stable and the priority shifts to AOV and lifetime value. Deliverables are concrete: a prioritised fix list, implemented changes, and a testing calendar, not a slide deck that sits in a drawer.
Using Shopify-specific apps and integrations for conversion optimization
Shopify’s app ecosystem can genuinely accelerate a CRO roadmap, but only if you’re deliberate about which categories you install, because each app is also a small performance cost.
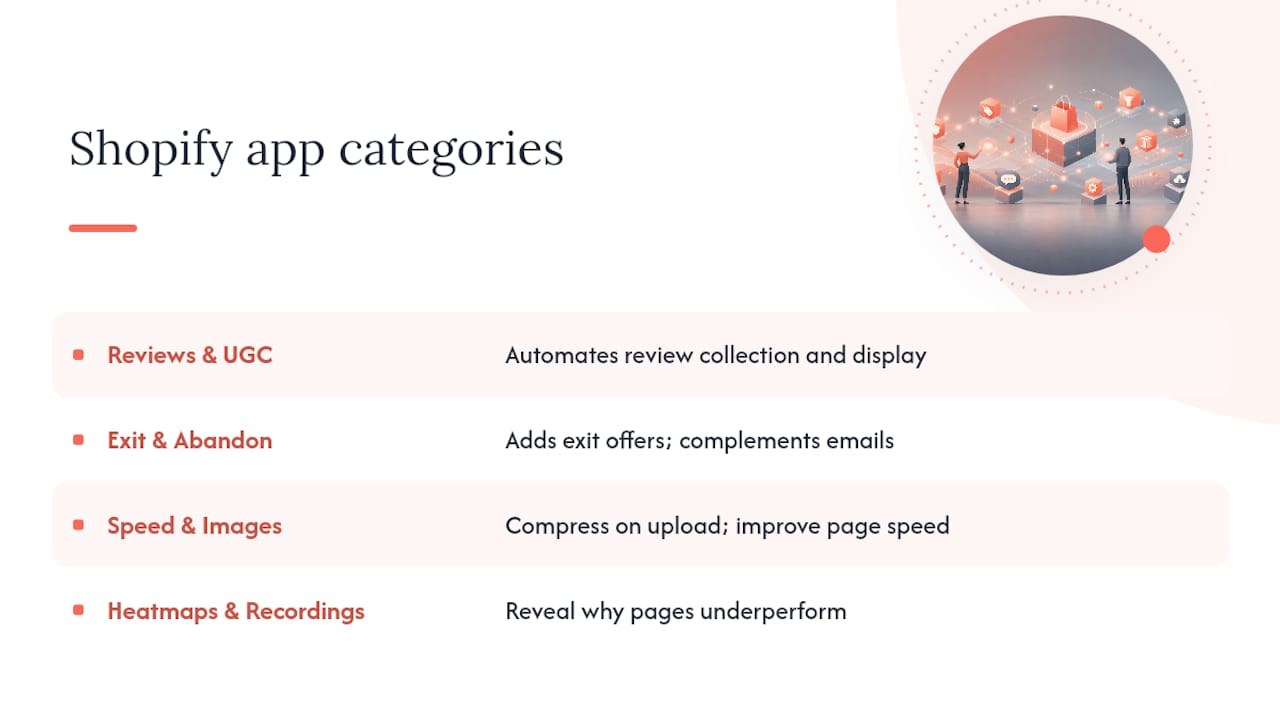
Focus on four categories: review and UGC collection (automates the request and display work covered in the product page section above), exit-intent and cart-abandonment tools (these work alongside, not instead of, Shopify’s native abandoned checkout emails), page speed and image optimisation apps (compress on upload rather than relying on theme defaults), and heatmap and session recording tools (these tell you why a page underperforms, not just that it does).
Resist the temptation to install an app for every tactic in this guide. Three well-chosen apps that each solve a specific, measured problem beat ten apps installed “just in case,” because every script added to your storefront is weight your mobile visitors have to load before they can buy anything. Before adding a new app, check whether an existing one already covers the job, and remove anything you can’t name a specific reason for keeping.
If your team needs deeper analytics or large-scale testing infrastructure beyond what native Shopify apps offer, proxy-based ecommerce intelligence tools can support competitive pricing checks and localisation testing at scale, which becomes relevant once you’re running multi-market campaigns.
Personalisation tactics using Shopify customer data
Shopify already collects the customer data most stores need for personalisation. Purchase history, browsing behaviour and email engagement sit in your admin right now, mostly unused beyond basic segmentation.
Start with the cheapest tactic: segmented product recommendations based on past purchase category, shown on the homepage and in post-purchase emails. Follow with behavioural triggers: a visitor who’s viewed the same product three times without buying is a different audience to a first-time visitor, and your email or on-site messaging should treat them differently.
Returning customers convert at meaningfully higher rates than first-time visitors, which makes loyalty-tier messaging (early access, tiered discounts, or simply recognising a repeat customer by name in an email subject line) one of the higher-leverage personalisation moves available on the platform, and it needs no custom development beyond your existing email and SMS tools.
Where this connects to broader retention work, CRM and marketing automation can layer behavioural triggers on top of Shopify’s native customer data, extending personalisation past the storefront into email and SMS sequences that respond to actual browsing and purchase signals rather than generic broadcast sends.
Strategies to reduce cart abandonment specific to Shopify stores
Cart abandonment on Shopify has a few causes that show up more often than others, and most of them are fixable without a developer.
Turn on abandoned checkout emails. This is a native Shopify feature, and most stores either haven’t switched it on or are running the default template with no urgency or incentive baked in. A two or three-email sequence, with the second offering a small nudge, recovers a meaningful share of abandoned carts on its own.
Remove surprise costs before the final step. Shipping cost and tax revealed only at the last page is one of the most common abandonment triggers, covered in the checkout fixes section above, and it’s worth revisiting here because it’s genuinely the single biggest lever in this category.
Simplify the cart-to-checkout handoff. Every extra click or page load between cart and payment is a chance for someone to close the tab. A one-page checkout with express payment options visible immediately removes several of those chances at once.
Use exit-intent offers sparingly. A well-timed discount or free-shipping nudge as someone moves to close the tab can recover a sale, but overuse trains customers to wait for a popup before buying, which erodes margin over time.
Author perspective: three counterintuitive lessons from real CRO work
Testing before fixing is the mistake I see most often. Running a split test on a checkout that’s already leaking guest-shoppers because there’s no guest checkout option doesn’t produce insight. It just produces two versions of the same broken outcome, and it burns weeks you could have spent on the actual fix.
AOV work should come after the funnel is stable, not before. Bundling and upsells amplify whatever conversion rate you already have, good or bad, so building them on top of a leaky checkout just means more people see an upsell they never convert on.
The smallest technical changes tend to punch above their weight early on. Compressing images or removing one unused app rarely feels like “real” CRO work, but it’s often the fastest measurable lift a store will see all quarter.
— Liza
How Moor Marketing can help: audit, sprints and ongoing CRO
Some agencies run the diagnostic loop described in this guide, without outsourcing the work to junior contractors. If you’ve read this far and know your checkout needs fixing but not the time to fix it, there are services that can close that gap.

Three ways to engage, depending on where you are: a focused audit if you need the diagnosis done properly and fast; a hands-on ecommerce marketing workshop if your team wants to build the skills in-house; or an ongoing retainer once you’re past the quick wins and want a senior strategist running the testing calendar month to month. Every engagement starts with the same audit structure covered above, because guessing at the leak wastes the client’s ad spend as much as their time.
If you want a second set of eyes on where your funnel is actually leaking money, book a discovery call and bring your last quarter’s Shopify Analytics with you.
Sources
- Conversion Rate Optimization (CRO): Get Started (Shopify blog)
- How to increase Shopify conversion rate — Yotpo