

Yes, you can run a valid A/B test on Shopify, and you don’t need an enterprise budget or a data team to do it properly. Shopify’s native Rollouts feature splits live traffic between two theme versions and reports the numbers back to you. It doesn’t tell you when a result is statistically significant, but it gives you the raw material to work with. For most stores, the highest-leverage place to start is the product page or the cart, because that’s where visitors decide whether to buy at all.
Before touching anything, sort out four things:
- Pick one metric. Revenue per visitor (RPV) beats conversion rate as your primary yardstick, because it captures both purchase rate and order value in one number.
- Pick one page. Product page or cart, not your homepage. That’s where money either moves forward or leaks out.
- Set your split. A 50/50 traffic split is the standard starting point unless you have a specific reason to weight it.
- Commit to two full weeks minimum. Weekly shopping patterns (payday, weekend browsing) skew short tests badly.
That’s the whole starting checklist.
Everything else in this guide is about doing each of those four steps properly.
Key Takeaways
A/B testing on Shopify works when you pick a revenue metric, calculate real sample size before launching, and isolate one variable at a time rather than swapping entire pages.
| Point | Details |
|---|---|
| Start on money-moving pages | Test the product page or cart first, since that’s where purchase decisions actually happen. |
| Measure RPV, not just conversion | Revenue per visitor catches basket-size shifts that conversion rate alone misses. |
| Calculate sample size upfront | Use your baseline rate and target lift together before launching, not after two weeks of data. |
| Run a disciplined two-week minimum | Avoid daily peeking, which inflates false positives and misleads winner calls. |
| Bring in Moormarketing for programs, not one-offs | Moormarketing runs hands-on CRO programs for Shopify stores when testing needs to scale past ad hoc experiments. |
Table of Contents
- What A/B testing shopify actually measures
- When should you run a Shopify A/B test?
- Which test type fits your Shopify store?
- Which tools work with Shopify for split testing?
- How do you set up a valid A/B test on Shopify?
- How do you interpret A/B test results correctly?
- How do you roll out a winning variant safely?
- What should you A/B test first on your Shopify store?
- How do you track A/B test data across Shopify and other tools?
- What does a real Shopify A/B test look like end to end?
- When should you hire help for Shopify testing?
- How can Moormarketing help with your Shopify testing program?
- Where to go for deeper A/B testing guidance
- Frequently asked questions
- Sources
What A/B testing shopify actually measures
A/B testing on Shopify means showing two versions of a page to different segments of your traffic at the same time, then comparing how each version performs against a metric you chose in advance. It’s not guesswork with extra steps. It’s a controlled comparison, and the “control” part is what most merchants skip.
Picture two live examples. First, a product page headline test: “Waterproof Hiking Boots” against “Boots That Survive Six Months of Trail Mud.” Second, a cart urgency test: adding “Only 4 left in stock” versus leaving the cart page as-is. Both are single-variable changes on a single page, which is exactly the level of isolation that makes a test readable.
The mistake most stores make isn’t running bad tests. It’s judging the right test by the wrong number. Conversion rate can go up while revenue per visitor goes down, if the winning variant nudges people towards cheaper items or smaller basket sizes.
That’s why Shopify’s own guidance on running statistically significant A/B tests points merchants towards revenue and order metrics rather than conversion rate alone. A 3% lift in conversion means very little if average order value drops 10% in the same period. RPV forces both numbers into one comparable figure.
Common elements worth testing, and where each shows up in your results:
- Call-to-action copy and colour — measured against add-to-cart rate.
- Hero image or headline — measured against click-through to product pages.
- Product image order and count — measured against add-to-cart and RPV.
- Trust badges and shipping messaging — measured against checkout completion.
When should you run a Shopify A/B test?
Start where the money leaks, not where the idea is most exciting. For most Shopify stores, that means the product page and cart first, the homepage and collection pages second, and checkout microcopy last (checkout changes are riskier to implement and slower to isolate).
A simple prioritisation framework, adapted from PIE and ICE scoring, works well for merchants without a dedicated CRO analyst. Score each test idea from 1 to 5 on three factors:
- Potential — how much room is there to improve on this page? A product page converting at 1.2% has more headroom than one already converting at 4%.
- Importance to RPV — how much traffic and revenue actually passes through this page?
- Ease of shipping — can you build this in the theme editor in an afternoon, or does it need a developer and three weeks?
Multiply or average those three scores, and you get a rough queue order. It’s not scientific, but it stops you from chasing the test that’s most fun to build instead of the one that moves the most revenue.
Here’s a worked example. Say you’re deciding between testing a new add-to-cart button colour on your bestselling product page, versus rebuilding your homepage hero banner. The button test scores high on ease (a few minutes in the theme editor) and reasonable on importance (that page gets most of your paid traffic), but low on potential (button colour rarely moves the needle much on its own). The hero rework scores high on potential and importance, but low on ease. Depending on your team’s current bandwidth, the button test usually wins as a quick first swing, while the hero rework goes into the queue as a bigger, better-resourced test for later.
Which test type fits your Shopify store?
Four test types cover almost every situation a Shopify merchant runs into, and picking the wrong one wastes traffic you can’t get back.
A/B testing compares two full versions of one page or element, split by percentage of traffic. This is the default for most Shopify experiments, because it’s the cleanest to read and the fastest to reach a verdict.
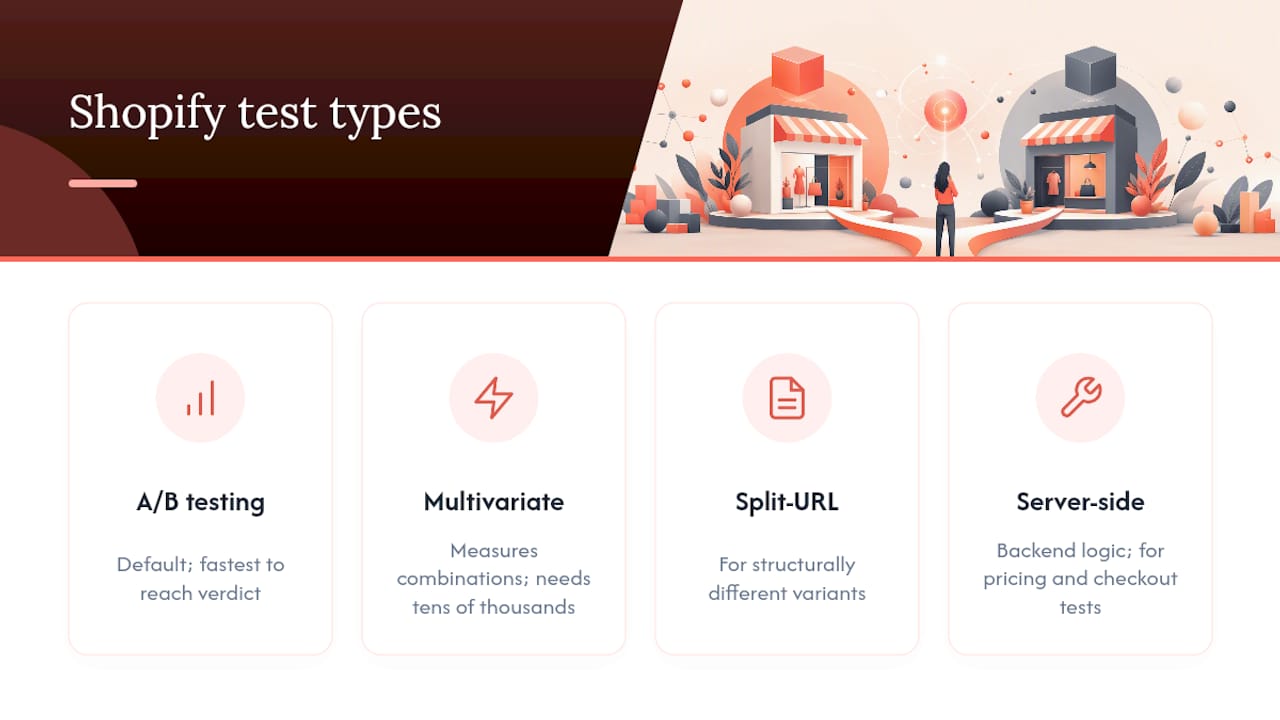
Multivariate testing changes several elements at once and measures every combination. It needs far more traffic than most Shopify stores get, so it’s rarely worth attempting below tens of thousands of monthly sessions.
Split-URL testing sends visitors to two entirely different URLs, useful when the variant is structurally different (a completely rebuilt product page template, for instance) rather than a tweak to the existing one.
Server-side or full-stack testing runs the experiment logic on your backend rather than in the browser, which matters for pricing tests, checkout flow changes, or anything where a flash of the original content before the variant loads would bias results.
Shopify’s own limitations shape which of these you can realistically run. Rollouts splits live traffic between two theme versions and reports sessions, conversion rate and revenue per variant, using deterministic bucketing so a returning visitor keeps seeing the same version. What it does not do is calculate statistical significance for you, and full checkout customisation for experiments is generally gated to Shopify Plus. On non-Plus plans, checkout page tests are limited to what you can do through post-purchase apps or checkout extensions, not a full rebuild.
Pro Tip: Reserve whole-theme tests for genuine redesign decisions. A full theme A/B test answers “should we switch to this new design permanently?” but needs far more traffic to reach a clean signal than a single template or section test, because you’re measuring dozens of changes bundled together instead of one.
Which tools work with Shopify for split testing?
Native Rollouts now handles the traffic-splitting job for many merchants without installing anything extra. But apps and platforms still earn their place when you need automated significance calculations, audience segmentation, or price testing that Rollouts wasn’t built for.
Three broad categories cover the market:
Native: Shopify Rollouts. Free, built into the admin, and sufficient for straightforward theme-level or section-level tests where you’re comfortable doing your own maths on significance. It’s the right starting point for most single-location stores testing one page at a time.
Shopify apps built for testing. Apps like Shogun and Intelligems slot into the theme editor or checkout extension points and typically add a significance engine, visual editing, and pricing-test support that Rollouts lacks. These suit merchants who want a guided workflow without hiring a developer for every test.
Full-stack and enterprise platforms. Optimizely, VWO, Convert, Kameleoon, and PostHog sit outside Shopify’s theme layer entirely and connect via APIs or tracking scripts. They bring Bayesian or frequentist stats engines, server-side testing, deep segmentation, and cross-channel experimentation (testing on Shopify and your app or marketing site together). Convert’s own comparison of Optimizely alternatives notes that platforms in this tier vary a lot on pricing and feature depth, so it’s worth matching the tool to the complexity of test you actually plan to run, not the most feature-rich option on the market.
If you’re weighing VWO against Convert, or VWO against Optimizely, the real decision usually comes down to your team’s skill set. Marketing-led teams tend to prefer visual editors and guided setup; engineering-led teams often prefer the flexibility of a full-stack platform like Kameleoon or PostHog, even if it takes longer to configure. Integration friction is the hidden cost either way: expect a week or two to properly wire up tracking and confirm your revenue events are firing correctly, regardless of which tool you pick.
How do you set up a valid A/B test on Shopify?
Every reliable test follows the same sequence: hypothesis, metric, minimum detectable effect (MDE), sample size, run the test, analyse, then deploy. Skipping a step is where most “we tested this and it didn’t work” stories actually come from.
- Write a hypothesis. State what you’re changing, why you think it’ll help, and what you expect to happen. “Adding a shipping cost estimator on the product page will reduce cart abandonment because unexpected shipping costs are the top-listed reason shoppers leave” is a hypothesis. “Let’s try a green button” is not.
- Choose your primary metric. RPV for most commercial tests; add-to-cart rate or checkout completion as secondary diagnostic metrics.
- Set your MDE. Decide the smallest lift that would actually be worth acting on. Chasing a 1% lift on a low-traffic store wastes months; a realistic MDE for most Shopify stores sits somewhere between 8% and 20% relative lift.
- Calculate sample size. Use your baseline conversion rate and MDE together, not a gut feeling.
- Set up the rollout. In the Shopify admin, go to Online Store > Themes > Rollouts, create a new rollout, set your treatment percentage, then edit the variant in the theme editor. If you’re using a third-party app instead, install it, connect your tracking, and build the variant inside the app’s own editor.
- Run for the full planned duration. No peeking-and-stopping early.
- Analyse against your pre-set metric and MDE, not whichever number looks best that week.
- Deploy the winner, or archive the result if there’s no clear lift, and move to the next test in your queue.
Pro Tip: Keep your traffic split close to 50/50 wherever possible. Uneven splits (like 80/20) take longer to reach significance because the smaller group accumulates data more slowly, and Rollouts’ deterministic bucketing means a visitor won’t flip between variants mid-session, which protects your data quality either way.
Sample size isn’t optional maths you can skip if you’re in a hurry. Standard sample-size calculations show that detecting a 10% relative lift at a 2% baseline conversion rate needs roughly 78,000 visitors per variant. That’s not a typo, and it’s the exact reason low-traffic stores need to either test high-traffic pages, accept a longer run, or aim for bigger, bolder changes that produce bigger, easier-to-detect lifts.
How do you interpret A/B test results correctly?
Statistical significance tells you whether a result is likely real, not whether it’s worth acting on. A 95% confidence result showing a 0.3% RPV lift might be real, but it’s rarely worth the engineering time to deploy. Business impact and confidence intervals matter as much as the p-value.
MDE and run-length planning need to happen before launch, not after you’ve already got two weeks of data and are trying to decide if it’s “enough.” Lehr’s approximation (the rough formula behind the sample-size table above) gives you a fast way to estimate the visitor count you’ll need without a statistics degree. Sequential peeking, checking your results daily and stopping the moment something looks significant, is one of the most common ways stores fool themselves. Stopping a test the moment it crosses a significance threshold inflates your false-positive rate substantially, because random noise will cross that threshold sooner or later even when there’s no real difference between variants.
Pro Tip: Consider holding back a small “no changes” slice of traffic even after you’ve picked a winner, especially on a big decision. It’s a cheap insurance policy against seasonality or external factors masquerading as your variant’s effect. Smaller stores often do better with a simpler Bayesian read (probability that variant B beats variant A) than a strict frequentist p-value, since Bayesian methods tend to be more forgiving of the smaller sample sizes low-traffic stores are stuck with.
How do you roll out a winning variant safely?
Publish the winning theme or variant only after you’ve checked RPV against a normal (non-promotional, non-seasonal) week, then keep monitoring for a regression in the following fortnight. A result measured during a sale period doesn’t necessarily hold once prices go back to normal.
The deployment checklist that protects both revenue and search visibility:
- Publish the winning theme as your live theme, rather than leaving it running as a duplicate.
- Check for redirect and canonical issues if the winning variant used a different URL structure, and use 301 redirects for permanent changes, not 302s meant for temporary tests.
- Confirm analytics tagging carried over correctly from the test variant to the live version, so your reporting doesn’t show a false drop the day you deploy.
- Ramp gradually on high-traffic stores rather than flipping 100% of traffic instantly, to catch any performance issue before it hits everyone at once.
Pro Tip: If you’re delivering variants client-side (in the browser, rather than server-side), watch for “flicker”: the original page briefly showing before the variant loads. It’s a small thing that erodes trust and can quietly bias your results toward the control. Test on a staging environment first and check your caching rules don’t serve a stale, uncached version of the control to variant visitors.
What should you A/B test first on your Shopify store?
Prioritise tests that touch actual purchase intent: the product page, add-to-cart flow, cart upsells, and checkout microcopy. A test on your blog’s “About Us” page might be interesting, but it won’t move revenue the way a product page test can.

Grouped by area, with a one-line hypothesis template for each:
Arrival and hero: “Changing the hero message from [generic] to [specific] will increase click-through to collection pages because visitors respond better to concrete claims than vague ones.”
Product page: “Reordering product images to lead with lifestyle shots instead of studio shots will increase add-to-cart rate because shoppers picture the product in use before they picture the product alone.”
Cart: “Adding a free-shipping progress bar will increase average order value because shoppers add items to unlock a threshold they can see.”
Checkout microcopy: “Rewording the shipping estimate field to state delivery dates instead of transit days will reduce checkout abandonment because a date feels more concrete than a number.”
Pricing and promos: “Testing a percentage discount against a dollar-value discount on the same offer will change conversion rate because framing affects perceived value even when the maths is identical.”
Pro Tip: Watch a secondary metric alongside RPV to diagnose why a test won or lost. If add-to-cart rate rose but RPV didn’t, the winning variant probably pulled in smaller-basket buyers, not more valuable ones, and that’s a very different story than a flat result.
How do you track A/B test data across Shopify and other tools?
Every test needs its results pulled from at least two places: Shopify’s own analytics for order and revenue data, and either Rollouts’ native reporting or your third-party tool’s dashboard for the split-level breakdown. Relying on just one source leaves gaps, since Shopify’s admin doesn’t natively separate revenue by which variant a visitor saw unless you’re using Rollouts or an app that tags orders accordingly.
Tag each variant with a UTM parameter or custom event so ecommerce performance metrics like RPV, average order value and add-to-cart rate can be filtered by variant inside Google Analytics or your reporting platform of choice. If you’re running a test through a full-stack platform like PostHog or Kameleoon, connect its event stream to Shopify’s order webhook data rather than relying on the platform’s own revenue estimate, which sometimes lags real order data by a day or more.
The practical habit that separates stores that improve steadily from stores that run one-off tests: archive every result, win or lose, with the hypothesis, sample size, duration and outcome recorded somewhere your team can search later. A failed test that’s documented saves you from re-running the same idea in eighteen months and getting the same flat result.
What does a real Shopify A/B test look like end to end?
Consider a mid-sized apparel store testing a product page change. The hypothesis: adding a size-guide link directly beside the size selector (instead of buried in the product description) will reduce size-related returns and increase add-to-cart rate, because uncertainty about fit is a known checkout blocker.

Step one: they checked baseline data.
Step two: they calculated sample size using their baseline rate and a target 15% relative lift, landing on a need for roughly three to four weeks of full traffic per variant, given their volume.
Step three: they built the variant using Rollouts, editing just the size-selector section of the product template rather than touching anything else on the page, keeping the test isolated to one variable.
Step four: they ran it for four full weeks, resisting the urge to check daily, and tracked add-to-cart rate as a secondary metric alongside RPV.
Step five: the variant won on RPV by a meaningful margin, and add-to-cart rate rose alongside it, which confirmed the lift wasn’t just shifting people toward cheaper items. They published the winning template change store-wide, checked their redirect and canonical setup (no URL changes were needed since it was a section-level edit), and monitored RPV for the following two weeks to confirm the lift held outside the original test window.
That’s the shape of a test that actually teaches you something: one variable, a real hypothesis, enough traffic to trust the number, and a documented result either way.
When should you hire help for Shopify testing?
Hire a specialist or agency when evaluating the lift requires cross-skill work you don’t have in-house: pricing experiments, server-side tests, or a testing program big enough that nobody on your team has the bandwidth to run it properly alongside everything else.
Signals that it’s time to bring in help:
- Low internal bandwidth. If tests keep getting deprioritised behind daily operations, they’ll never accumulate enough runs to compound.
- Complex tracking requirements. Multi-channel attribution, server-side experiments, or pricing tests that touch your payment gateway need setup expertise most in-house teams haven’t built.
- High revenue at stake. A test on your highest-traffic page justifies getting the statistics right the first time.
- Missing design or development support. Some winning variants need custom development work Rollouts and basic apps can’t deliver alone.
- No one who can call statistical significance confidently. Guessing at “is this result real” is how stores implement changes that were actually noise.
Agencies typically structure a CRO engagement around a recurring testing cadence: an initial audit to find the highest-leverage pages, a prioritised test queue built with a framework similar to the one covered earlier in this guide, then ongoing test cycles with documented results feeding the next round of hypotheses. Moormarketing runs this kind of program hands-on with senior strategists rather than handing it to junior staff, which matters because reading a test result correctly (not just running one) is where most of the real value sits. The gap between a store that runs tests and a store that runs a program of tests is usually a dedicated person or team keeping the queue moving and the documentation honest.
How can Moormarketing help with your Shopify testing program?
Running one A/B test is straightforward. Running a disciplined program of them, month after month, with the sample-size maths done properly and the results actually acted on, is where most in-house teams stall. Moormarketing builds and runs conversion rate optimisation programs specifically for Shopify and WordPress stores, pairing hands-on strategy work with the paid traffic and funnel expertise needed to make sure the tests you run are actually worth the traffic they consume.

If your product pages or cart are leaking revenue and you’re not sure which test to run first, or you’ve tried Rollouts and hit its limits around segmentation and significance, that’s exactly the gap Moormarketing’s ecommerce growth strategy work is built to close. For teams that want a structured, hands-on introduction to running tests properly, the ecommerce marketing workshops cover exactly this kind of governance and setup. If you’d rather hand the whole testing program to senior strategists and get back to running the business, get in touch to talk about your store.
Where to go for deeper A/B testing guidance
A few sources are worth bookmarking once you’ve run your first test and want to go further:
- Shopify’s own A/B testing guide covers the platform’s recommended process for running statistically sound tests and choosing business-focused metrics.
- Evan Miller’s sample-size calculator and methodology is the reference most CRO practitioners use for working out exactly how many visitors a test needs.
- Evan Miller’s guide on stopping-rule mistakes explains why checking results daily and stopping early inflates false positives, with worked examples.
- Convert’s roundup of Optimizely alternatives is useful once you’ve outgrown Rollouts and are comparing full-stack platforms on features and pricing.
- Talk Shop’s walkthrough of the Rollouts admin flow is the most direct reference for the exact clicks involved in setting up a native test.
Frequently asked questions
Can you A/B test on Shopify without an app?
Yes. Shopify’s native Rollouts feature, available in the theme section of the admin, splits live traffic between two theme versions without any app installation. It reports sessions, conversion rate and revenue per variant, though you’ll need to calculate statistical significance yourself.
What’s the difference between VWO, Convert, and Optimizely for Shopify testing?
All three are full-stack experimentation platforms that connect to Shopify via tracking scripts rather than living inside the theme editor. They differ mainly in stats engine design, pricing structure, and how much segmentation and server-side testing capability they offer, so the right pick depends on whether your team is marketing-led or engineering-led.
How long should a Shopify A/B test run?
Run for a minimum of two full weeks to capture a normal weekly shopping cycle, and longer if your calculated sample size requires it. Stopping early because a result looks significant is one of the most common causes of false positives.
Is Shopify Rollouts good enough, or do I need a third-party app?
Rollouts handles the traffic split and basic reporting well for straightforward theme or section tests. You’ll want an app like Shogun or Intelligems, or a platform like Kameleoon or PostHog, once you need built-in significance calculations, audience segmentation, or pricing experiments.
What’s a good first A/B test for a small Shopify store?
Something on your highest-traffic product page with a clear, single-variable hypothesis, such as reordering product images or changing the call-to-action button copy. Small stores should aim for bigger, bolder changes rather than subtle tweaks, since low traffic makes small lifts hard to detect reliably.
Sources
- A/B Testing: How To Run a Statistically Significant A/B Test (2026) – Shopify
- Shopify A/B Testing: The Complete 2026 Guide
- Sample size calculations for A/B testing — Evan Miller
- Shopify Native A/B Testing: How to Use (2026) | Talk Shop
- Optimizely Alternatives: Top A/B Testing Platforms to Consider for 2026 — Convert blog